Most people doing bicep curls are leaving gains on the table. Not because the exercise is wrong, but because they are only ever doing 1 variation of it.
The supinated curl, palms up, is the default, but training your arms exclusively this way means the brachialis and brachioradialis, 2 of the key muscles responsible for arm thickness and elbow strength, barely get a look-in.
Incline hammer curls change that.
By combining a neutral grip with the extended range of motion that an incline bench provides, they hit the muscles in your arm differently and more completely than a standard curl. Once you understand why the grip and the position both matter, the exercise makes a lot more sense.

Quick Summary
- Incline hammer curls combine a neutral grip with a backward arm position on an incline bench, targeting the brachialis and brachioradialis alongside the biceps.
- The incline position increases range of motion and eliminates momentum, ensuring the muscles are loaded at their most stretched point and maximizing the hypertrophic stimulus during each rep.
- Performed alongside traditional supinated curls, incline hammer curls complete arm development by enhancing peak, thickness, grip strength, and elbow health, all while being wrist-friendly and versatile with variations and progressions.
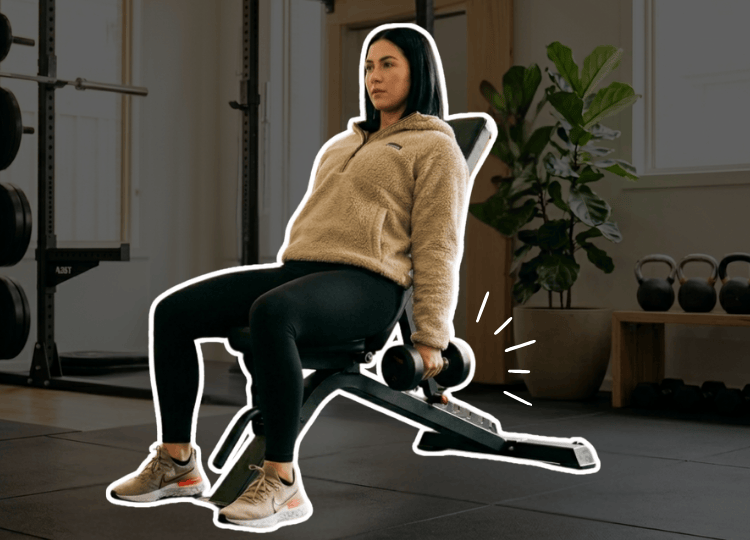
How to Perform Incline Hammer Curls
To do incline hammer curls:
- Set an adjustable incline bench to between 45 and 60 degrees. Steeper than 60 degrees reduces the range of motion benefit and starts to resemble a seated upright curl. Below 45 degrees, the shoulder becomes more involved and the stimulus shifts away from the target muscles. 45 to 60 degrees is the sweet spot.
- With your back against the bench, let your arms hang straight down on either side. Your palms should be facing each other in a neutral grip, with the dumbbells hanging vertically. You will feel a stretch in the biceps and upper arm before the movement has even started.
- Keeping your upper arms still and your elbows pointing straight down throughout, curl both dumbbells upward by hinging at the elbow. Do not twist or rotate your wrists during the movement. The dumbbells should stay in the same vertical orientation from bottom to top.
- Continue curling until your forearms are vertical and you feel a strong contraction in the upper arm. Pause briefly at the top.
- Lower the dumbbells slowly and with control back to the starting position. Do not let gravity do the work for you here. The lowering phase, the eccentric portion of the lift, is where a significant amount of the muscle-building stimulus occurs. Aim for 2 to 3 seconds on the way down.
Sets and reps
3 to 4 sets of 8 to 12 reps per session. Start with a weight that allows full control throughout the entire range of motion, including the lowering phase.
Grip Position: Why It Changes Everything
Before getting into the incline element, it is worth understanding what actually changes when you rotate your grip.
Supinated Grip
A supinated grip (palms facing up) is what you use in a standard bicep curl. The biceps brachii, the large visible muscle on the front of your upper arm, is also a forearm supinator.
This means that with a palms-up grip, the biceps is in its mechanically strongest position and takes on the majority of the work. EMG research published in the journal Sports confirms this: biceps brachii excitation was significantly greater during the ascending phase of supinated curls compared to neutral and pronated grip variations.
Neutral Grip
A neutral grip (palms facing each other) is what makes a hammer curl a hammer curl. The dumbbell is held vertically, like a hammer, rather than horizontally.
In this position, the biceps brachii is partially disadvantaged as a supinator, which means the load is distributed more evenly across all 3 elbow flexors: the biceps, the brachialis, and the brachioradialis. Research by Bagchi and Raizada found that hammer curls produced the greatest activation of the brachioradialis of any curl variation tested.
What Does This Mean?
This is not a small distinction.
The brachialis, which sits directly beneath the biceps, is actually the primary flexor of the elbow. StatPearls anatomy literature describes it as generating roughly 50% more power than the biceps during elbow flexion. Because it inserts into the ulna rather than the radius, it is not involved in supination or pronation at all, making it equally active regardless of forearm position. But the neutral grip of the hammer curl places greater relative demand on it than a supinated curl does, simply because the biceps is doing less of the work.
The practical result is that hammer curls build thickness in the arm that standard curls alone cannot match, because they develop the brachialis and brachioradialis alongside the biceps rather than in spite of it.
Why the Incline Makes a Difference
A standing hammer curl is a solid exercise. The incline version is better, and the reason comes down to what happens to your arm position when you sit back against an inclined bench.
When you stand upright to perform a curl, your arms hang by your sides, roughly in line with your torso. The starting position of the dumbbell is at your hip. When you sit on an incline bench set to around 45 to 60 degrees and lean back into it, your upper arms fall behind the plane of your body. This is the key mechanical difference.
Because the arms are positioned behind the torso at the start of the movement, there is considerably more distance for the dumbbell to travel before reaching the shoulder. That is a greater range of motion. And a greater range of motion means the muscles are loaded through a longer arc, including at the point where they are most stretched.
Research consistently shows that loading a muscle at longer lengths, the stretched position, drives greater hypertrophy than training through a partial range. The incline position ensures the biceps and brachialis are under tension at their most lengthened point at the bottom of every rep, a stimulus that standing curls simply cannot replicate to the same degree.
Reduce Momentum
There is a secondary benefit too. With your back pressed flat against the incline, you are physically unable to use your shoulders, hips or lower back to generate momentum. In a standing curl, it is easy to swing the weight up, particularly when fatigued. The bench eliminates that option entirely and forces the work back into the arms where it belongs.
Muscles Worked
- Biceps brachii – Still fully involved, with the long head getting the spotlight. The incline position stretches the long head more than in standard curls, thanks to the behind-the-body starting position. Using a neutral grip ensures the biceps works alongside the brachialis rather than taking over, which is the main goal of this exercise.
- Brachialis – The true star of the incline hammer curl. Sitting beneath the biceps, it’s the strongest pure elbow flexor and lights up with a neutral grip. Strengthening the brachialis pushes the biceps upward and outward, enhancing overall arm thickness and peak.
- Brachioradialis – Running from upper arm to wrist, this forearm muscle helps flex the elbow and shines when the forearm is neutral, as in hammer curls. It boosts forearm thickness and grip strength, making it a key contributor to upper arm aesthetics and functional strength.
Benefits
Greater range of motion than a standing curl
Sitting back against the incline bench positions the arms behind the torso, extending the starting position well beyond what is possible standing upright. This means the muscles are loaded through a longer arc and trained in their most stretched position, which research associates with superior hypertrophy outcomes.
Eliminates momentum and cheating
The back is supported by the bench throughout. There is no opportunity to swing the weight using the hips, lower back or shoulders. Every rep is earned by the arms alone, which increases the quality of each set.
Develops arm thickness, not just peak
The neutral grip shifts emphasis toward the brachialis and brachioradialis. The brachialis in particular, when developed, physically pushes the biceps upward from underneath, creating a fuller and thicker appearance to the upper arm that standard supinated curls cannot produce on their own.
Complements standard bicep curls
Neither exercise is better than the other in absolute terms. They work the same general area but emphasise different aspects of it. Supinated curls drive more direct biceps activation. Incline hammer curls develop the underlying muscles that give the arm its overall size. Including both in a training week produces more complete arm development than either alone.
Wrist-friendly
The neutral grip is a more natural position for the wrist than a fully supinated grip, particularly under load. For anyone who experiences wrist discomfort during standard curls, hammer curls are often the more comfortable alternative.
More Bicep Workout Ideas
Check out our bicep and shoulder workout for more practical ways to train your arms.
Variations and Progressions
- Alternating arms. Rather than curling both dumbbells simultaneously, alternate between the left and right arms. This allows each side a brief recovery between reps and can help improve the mind-muscle connection by allowing you to focus on 1 arm at a time.
- Single arm. Performing 1 arm at a time with a controlled setup allows you to direct full attention to the working arm and identify any significant strength imbalance between sides.
- Resistance bands. If the right dumbbell weight is not available, a resistance band can be used as a substitute. Loop it under the bench legs and hold an end in each hand.
- Slow eccentric. Rather than simply lowering the weight, count 3 to 4 seconds on the descent. This increases time under tension substantially and is a useful progression when the standard tempo starts to feel too easy without adding weight. Learn more about the power of eccentric reps in our guide about negative bicep curls.
- Cross-body variation. At the top of each curl, bring the dumbbell toward the opposite shoulder rather than straight up. This variation targets the outer bicep and adds variety to the movement pattern.
Things to Keep in Mind
Use a lighter weight than you expect. The incline position, combined with the stricter form it enforces, means most people need to drop 10 to 20% of what they would use for a standing curl. That is not a weakness, it is the exercise working as intended.
Keep the upper arms still throughout. If the elbows are drifting forward or backward during the curl, the shoulders are getting involved. Pin the elbows down and let the forearms do the moving.
Do not rush the lowering phase. Fast, uncontrolled descents are one of the most common ways to reduce the effectiveness of this exercise significantly. The slow lowering phase is where a large portion of the muscle stimulus occurs.
Set the bench angle correctly. Too steep and you lose the extended range of motion that makes this variation superior to a seated upright curl. Too shallow and the shoulder begins to contribute. 45 to 60 degrees is where the exercise works best.
Bottom Line
Incline hammer curls are one of the most effective arm exercises available, for 2 reasons that stack on top of each other. The neutral grip distributes work across the brachialis and brachioradialis, muscles that standard curls largely neglect. The incline position extends the range of motion beyond what is possible standing, loading those muscles at their longest point where the hypertrophic stimulus is greatest.
Neither standard bicep curls nor incline hammer curls are complete on their own. Together, they cover the full range of what arm training should address: peak, thickness, grip strength and elbow health. If you are only doing 1, the other is the next exercise to add to your week.
Related Articles: