Most lower body routines lean heavily on bilateral movements.
Squats, deadlifts, leg press… both legs working together, sharing the load. What that approach can miss is the fact that almost every functional movement in real life, from walking and running to climbing stairs, is driven by one leg at a time.
The skater squat addresses this directly. It is a single-leg exercise that places almost all of the work through one leg while the other leg extends behind the body, hovering just above the ground.
The result is a movement that builds unilateral lower body strength, challenges balance and stability, and exposes side-to-side muscle imbalances that bilateral training can easily mask.
This guide covers everything you need to know, including how to perform the skater squat, the muscles it works, the key benefits, things to watch for, how it compares to similar exercises, and how to progress once the basic version feels comfortable.

Quick Summary
- The skater squat is a single-leg exercise where one leg squats while the other extends behind the body, hovering just above the floor – placing full demand on the working leg with no rear foot support.
- It primarily targets the quads, glutes and hamstrings, while also building core stability and balance in a way that bilateral exercises like squats and deadlifts can’t replicate.
- It sits between the reverse lunge and the pistol squat in terms of difficulty, making it a practical progression for intermediate trainees and a useful stepping stone toward more advanced single-leg movements.
What is a Skater Squat?
The skater squat is a unilateral lower body exercise performed by squatting on one leg while the opposite leg extends behind the body with the knee travelling toward the ground. The name comes from the way the trailing leg mimics the gliding motion of a speed skater.
Unlike a reverse lunge, the back foot never makes contact with the floor, which means the working leg carries full responsibility for controlling the descent and driving back up to standing.
This makes the exercise considerably more demanding on balance and stability than most split-stance variations.
It can be performed as a bodyweight exercise or loaded with dumbbells and other implements as strength develops. No equipment is required to get started, which makes it easy to include in home and travel workouts as well as in the gym.
How to Perform the Skater Squat
To do the Skater Squat:
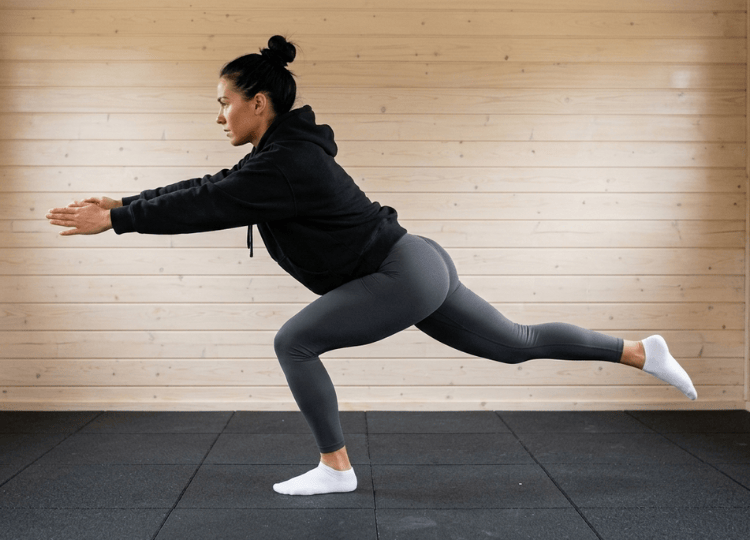
- Stand tall with your feet hip-width apart and your core braced.
- Lift your right foot off the ground and allow the right knee to bend, so the lower leg floats behind you.
- Hinge slightly at the hips and begin bending the left knee, lowering your body toward the ground in a controlled manner.
- As you descend, the right knee will travel toward the floor behind you. The aim is to bring it close to the ground without letting it touch or rest on it.
- Keep your chest up, your back flat, and your weight evenly distributed through the working foot, with pressure felt through the heel and midfoot.
- Drive through the left foot to reverse the movement and return to standing.
- Complete all reps on one side before switching legs.
Coach’s Tip – Many people find it helpful to extend both arms forward as a counterbalance during the descent, particularly when learning the movement. A light dumbbell held in front of the chest can serve the same purpose and makes it easier to control the torso position. If the back knee is touching the floor every rep, place a small pad or folded mat beneath it to use as a depth gauge rather than a support.
Muscles Worked
The skater squat works a range of lower body and stabilising muscles, including:
- Quadriceps – the primary driver of the movement, working eccentrically to control the descent and concentrically to drive back up to standing.
- Gluteus Maximus – extends the hip as you return to standing and contributes to overall lower body power through the movement.
- Gluteus Medius – stabilises the pelvis laterally throughout, keeping the knee tracking in line with the toes rather than caving inward.
- Hamstrings – assist with hip extension on the way back up, with their contribution increasing as hip flexion deepens.
- Core – works continuously to keep the torso upright and the pelvis level, with the single-leg nature of the exercise creating a greater stabilisation demand than bilateral alternatives.
- Ankle and Foot Stabilisers – smaller muscles of the ankle and foot contribute significantly to maintaining balance through a single contact point.
How Does the Skater Squat Compare to Similar Exercises?
Skater Squat vs Reverse Lunge
The reverse lunge is often considered the most accessible entry point into single-leg training. The key difference is that in a reverse lunge, the back foot makes contact with the floor at the bottom of each rep, providing a base of support that significantly reduces the balance demand. This makes the reverse lunge easier to learn and appropriate for beginners.
The skater squat removes that rear foot support entirely. The working leg must control the whole movement, which places greater demand on the quads, glutes and stabilising muscles of the ankle and foot. For those who have outgrown the reverse lunge as a challenge, the skater squat is a logical next step.
Skater Squat vs Pistol Squat
The pistol squat is the most demanding single-leg squat variation commonly practised. It requires the non-working leg to extend forward parallel to the ground while the working leg descends into a full single-leg squat, demanding a combination of strength, flexibility and balance that most people take considerable time to develop.
The skater squat sits between the reverse lunge and the pistol squat in terms of difficulty. The trailing leg extends behind the body rather than forward, which places less demand on hamstring flexibility and hip mobility than the pistol squat requires. This makes the skater squat a more realistic target for intermediate trainees and a practical stepping stone for anyone working toward the pistol squat.
Benefits of Skater Squats
Addresses Muscle Imbalances
In bilateral exercises, the stronger leg has a tendency to take on a disproportionate share of the work. Research and practical experience both support the idea that this can reinforce existing strength differences rather than resolve them.
Unilateral exercises like the skater squat force each leg to work independently, ensuring the same volume and demand is applied to both sides equally. Over time, this helps bring a weaker leg up to a level closer to the stronger one.
Builds Single-Leg Strength Relevant to Real Life and Sport
Most athletic movements, from running to jumping to change of direction, are driven by one leg at a time. Training in a way that reflects this makes practical sense.
A meta-analysis of unilateral versus bilateral resistance training found that unilateral exercises tend to transfer more effectively to sport-specific movements, particularly those involving change of direction and single-leg power output.
Develops Balance and Proprioception
The skater squat provides a meaningful balance challenge, particularly during the descent when the body is managing both knee flexion and hip hinge simultaneously on a single foot.
Research has indicated that even a single session of unilateral balance-focused training can produce acute improvements in balance performance, with cumulative benefits building over time.
Strengthens the Core
As mentioned in the muscles section, the asymmetrical loading of a single-leg exercise creates a rotational challenge that the core has to resist. This makes the skater squat a useful tool for building functional core stability, even though it is primarily classified as a lower body exercise.
Reduces Spinal Load
Because the skater squat does not require axial loading through the spine in the way a barbell back squat does, it can be a useful option for building lower body strength while managing spinal stress. You can load the exercise meaningfully with dumbbells held in front of the body while keeping the load off the spine entirely.
Exposes Weaknesses Before They Become Injuries
The balance demand of the skater squat leaves very little room for compensation. Weaknesses in hip stability, ankle control or quad strength become apparent quickly.
This makes it a valuable diagnostic tool for identifying asymmetries or movement quality issues that might otherwise go unnoticed in bilateral training, and addressing them before they contribute to injury.
Things to Consider
The skater squat is a technically demanding exercise and it is worth approaching it with patience, particularly if single-leg training is new to you.
The most common mistake is allowing the working knee to cave inward during the descent. This is usually a sign of insufficient glute medius strength or activation. Focus on pushing the knee outward in line with the toes throughout the movement. If this is a persistent issue, spending time on glute activation work such as banded clamshells or lateral band walks before practising the skater squat can help.
Rounding the upper back during the descent is another frequent error, often a sign that the core is not sufficiently braced or that hip mobility is limiting the movement. Keeping the chest up and the arms extended forward as a counterweight can help maintain a more upright torso position.
If balance is a significant challenge initially, it is reasonable to lightly touch a wall or the back of a chair with one hand while learning the pattern. The goal is to remove this support progressively as control improves, rather than to rely on it indefinitely.
Start with a modest range of motion if needed and build depth gradually as strength and balance allow.
How to Add Progression
Once the bodyweight skater squat feels controlled and stable through a full range of motion, there are several straightforward ways to increase the challenge.
Holding Dumbbells
The most practical progression is to hold a dumbbell in each hand, either hanging at the sides or held in a goblet position at the chest. Adding external load increases the demand on the quads and glutes and also makes core stabilisation harder. Start with a light weight and prioritise maintaining form before increasing load.
Single Dumbbell as Counterbalance
Holding a single light dumbbell with both hands extended in front of the chest is actually an intermediate step between the pure bodyweight version and a fully loaded skater squat. It makes the balance component slightly easier by shifting the centre of mass forward, while still adding some load.
Slower Tempo
Increasing the time spent lowering into the squat, for example taking three to four seconds on the descent, increases the time under tension for the quads and glutes without requiring any additional load. This is a useful way to build strength and muscle while keeping the movement controlled.
Elevated Surface
Performing the skater squat with the working foot on a low box or step increases the range of motion and deepens the stretch through the hip and quad. This is an advanced variation and should only be attempted once the standard version is well established.
Adding a Jump
For those training for power or sport performance, the skater squat can be made explosive by driving through the working leg to jump at the top of each rep. This variation significantly increases the demand on the neuromuscular system and is best suited to athletes with a solid foundation in the standard movement.
Bottom Line
The skater squat is one of the more effective single-leg exercises available, sitting at a useful point between accessible split-stance movements and advanced single-leg variations like the pistol squat.
For most people, starting with the bodyweight version and focusing on controlling the descent is the right approach. Once balance is consistent and range of motion is solid, adding light load and experimenting with tempo are natural next steps.
Related Articles